Thursday, February 23, 2012

Just an Update and a Smile


We are finally painting my sewing room. I posted about doing it early last year and it has taken me this long to get to it. As with many home projects this one is leading to another. We really need to replace the flooring. We plan to replace the vinyl tiles the inexpensive way – with more vinyl tiles. I plan to do some rearranging and organizing, too. I bought some baskets at Home Goods last month. I’ll post a photo when we are done and link to my post from last year.

Moving my fabric and quilting paraphernalia was a good exercise for me this week because I’m going to the Mid-Atlantic Quilt Festival tomorrow. I really must limit my acquisitions- especially fabric. I made a list – thread and paper for paper piecing are among a few other items. I have a friend who moved to Hampton a couple years ago to live with her daughter so I’m going to pick her up and take her to the show. We talk on the phone everyone once in a while but it will be good to see her. This is the first time I’ve gone to this show and I’m excited. I’m also looking forward to going on the bus trip organized by my guild to the AQS show next month in Lancaster, Pennsylvania. I’ve been to that show before, but it’s been years. My only regret is that I will be up there and won’t be going to Burkholder’s.


Lots to look forward to and lots I want to do. When we moved the furniture to the middle of the room to paint, I made sure I had access to everything; especially my sewing machine. I have a banner block for Mclean QU, a raffle block for Springfield QU and HSTs for the McLean auction to make. I’m making the HSTs out of batiks. I know quilters love batiks, but I’m one who doesn’t really care for them. I think it is their stiffness that turns me off. I have a small stash and it will all go to the auction. I’m making some HSTs with them because the challenge this year is to make a quilt using 250 HSTs. Just thought it would sweeten the pot and maybe someone will do the challenge that may not have otherwise. And then, of course, there are all the other projects I’ve posted about in recent months.


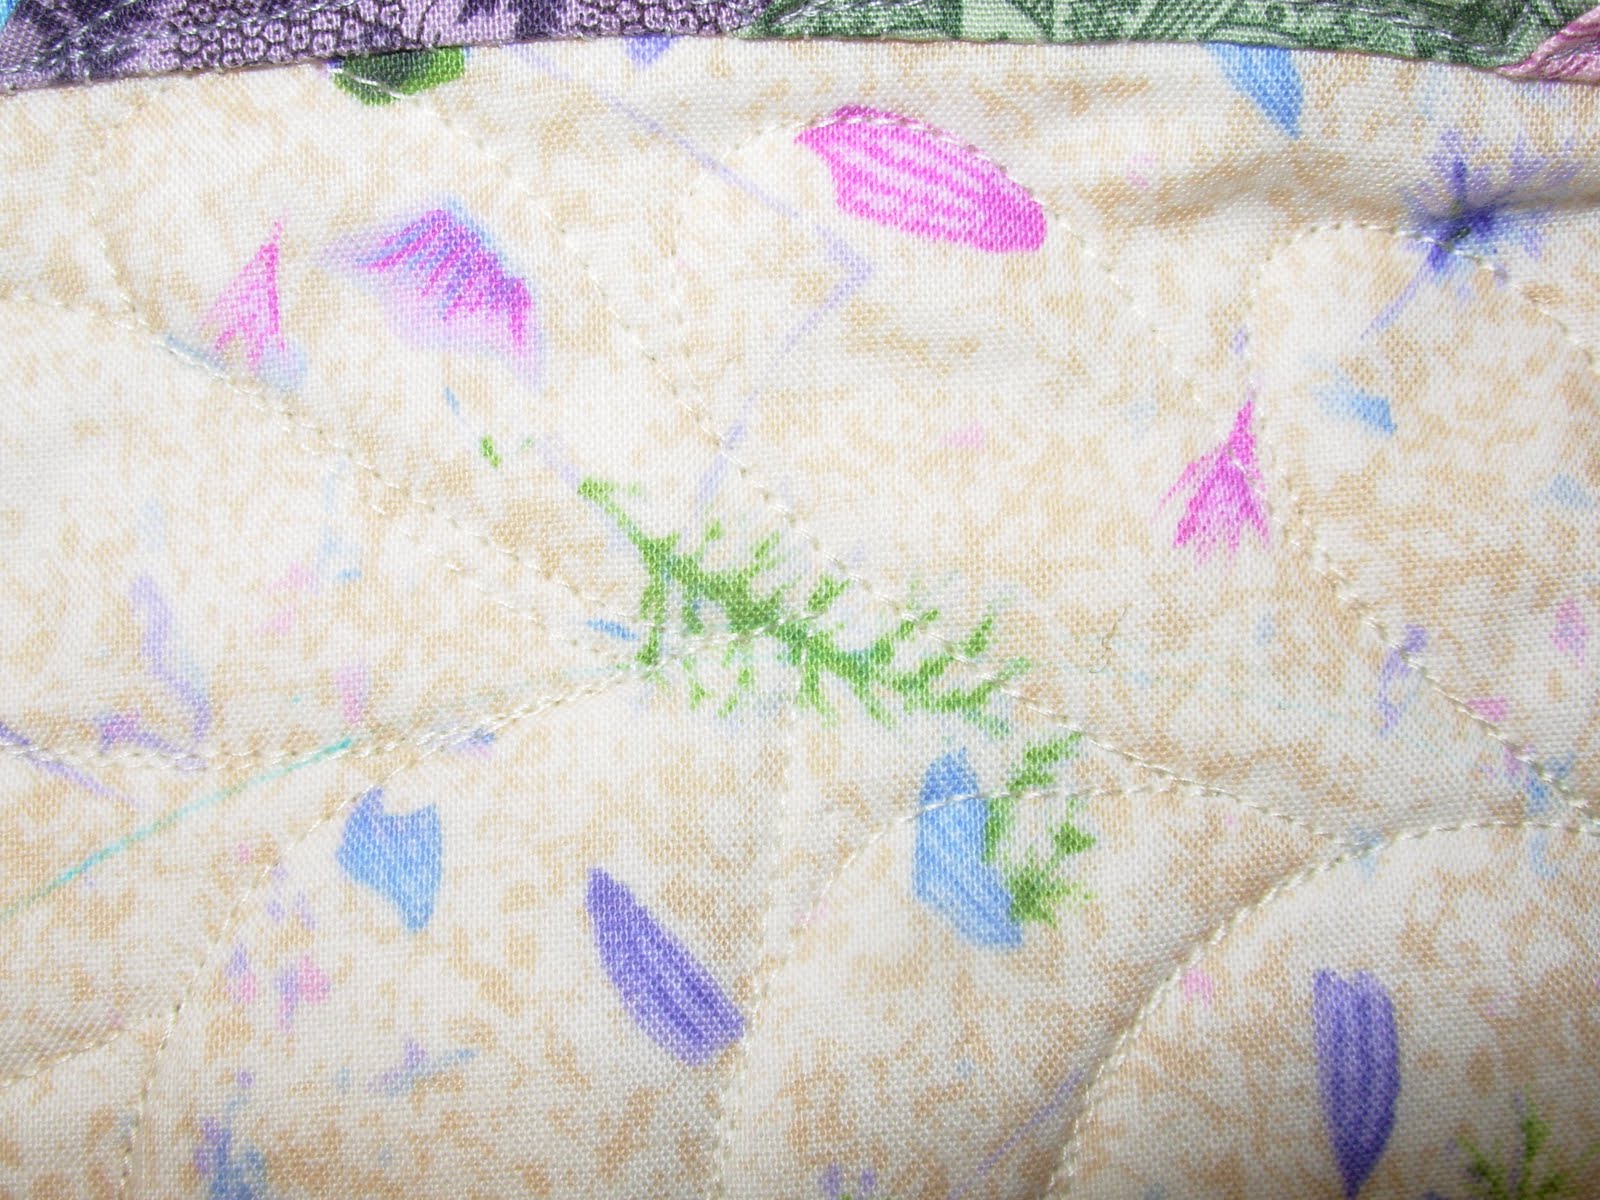
I’m keeping up with my hand quilting and here is a peak of the border quilting on the lone star. I had to get the binding on by last Tuesday so it could be photographed for the show layout committee. I still have to quilt the big triangular areas and inside the feathered wreaths before I can call it done.

Quiltmania has become my favorite quilt magazine. The only way I know of to get it delivered is through Amazon. I think I worked it out and it is a bit less expensive to buy it at a Barnes and Noble bookstore. The trick is actually finding it there. It has become a treasure hunt for me. When I know a new edition is out I stop in a Barnes and Noble when I’m near one. It usually takes a few stops before I hit gold. I love the quilts featured in this magazine and I get a kick out of their French to English translations. I must say I’m very thankful they do it because languages are not my strong point. If it wasn’t in English I wouldn’t buy it. In the Reader’s Corner they review recent publications. In the Jan/Feb 2012 edition they review The Quilters Hall of Fame and have this to say about it. “Each year this very reputable organisation nominates someone who has contributed in a remarkable way to the world of quilting. Quilters, authors, historians and collectors receive the quilty equivalent of an Oscar award, delivered by this organisation based in Marion, Indiana. This bulky book features all the recipients up to this day, and includes their masterworks.”  Bulky? It brought a smile to my face.

So did this-

“Prepare yourself mentally for sewing.

Think about what you are going to do.

Never approach sewing with a sigh or lackadaisically.

Good results are difficult when indifference predominates.
Never try to sew with a sink full of dirty dishes or beds unmade.

When there are urgent housekeeping chores, do these first so your mind is free to enjoy your sewing.
Put on a clean dress.
When you sew, make yourself as attractive as possible.
Keep a little bag full of French chalk near your sewing machine to dust your fingers at intervals.

Have your hair in order, powder and lipstick put on. If you are constantly fearful that a visitor will drop in or your husband will come home and you will not look neatly put together, you will not enjoy your sewing as you should.”

From the 1949 Singer machine manual. It got a big laugh at the Springfield QU meeting last Tuesday.

Life is good!

Wednesday, February 15, 2012

A Place for Quilts


I almost titled this post “Chalk Paint”, but that’s not very quilty and since this is a quilt blog I thought I’d focus on the function of my newly painted vintage desk. 


This little desk was my mom’s.  She gave it to me (well, she really gave it to my son, but he doesn’t seem to mind my antics with it). I think this is the third time I’ve painted it. The last time was a bad milk paint job.
The lid won’t stay on because the wood has rotted in one corner. 

I put two coats of Old White Annie Sloan Chalk Paint (drying 24 hours and sanding after each coat) and two coats of Annie Sloan Clear Wax (again, drying 24 hours and buffing after each coat). Thanks to my DH for helping me with the buffing - that's a good workout! The surface is really smooth and I’m very happy with how it turned out.


I also did these two wooden trays. I’m not sure what I will do with them. I picked them up cheap and they were a good example of a smooth wood surface and a rough one. 


What did I learn? Next time I will put on two thicker coats of paint or a third thin coat. It really is a friendly paint – no priming needed though there were some rough spots on the desk I wish we had smoothed out more.

I’m participating in the Jubilee Quilt Project that Barb, Regan and Lori have masterminded. The link is on my blog list. I plan to post soon, ideally tomorrow since I turn 51 on Friday. I figure at least I will have a start as a 50 year old. I’m glad they aren’t being too strict with participation.
; c )


Saturday, February 11, 2012

Millwheel


Or Double Millwheel according to my two block pattern books. I purchased this quilt at an estate sale yesterday. I was out and about – picking up chalk paint and stopping at thrift stores. I don’t know enough to put a date on the quilt – just that it is old. I’d love to give it a bath. Dare I toss it in my front load washer? I won’t do it before I get an okay from someone with knowledge of old quilts. It just has a slight odor. What bothers me more is the surface dirt. It looks to me like it is hand pieced. Not the finest hand quilting, but not bad and a good amount of it.  Baptist fans are my favorite hand quilting design.


 The binding is the front border rolled over to the back and hand stitched.


Thursday, February 9, 2012

Quilting Away and a New Distraction


In the evenings I’m working on this-


I do at least one fan, maybe two each evening. If I keep at it I should be done in a month. Maybe sooner since the closer I get to the finish the more I want to do. I first posted about this project here.


During the day, I’m carving out a little time to machine quilt my lone star. I found directions in Harriet Hargrave’s Heirloom Machine Quilting (I have the third edition) on how to do a continuous curve. If my thread hadn’t broken midway (there was a knot coming off the spool!) I could have done the whole star without stopping. I’m happy with how it looks. Now I’m making feather wreaths in the corners.


Here you can see I’ve gone all the way around and come back to the start of my wreath. This is the trickiest part – getting it to fit. This is my second wreath. On my first I ended up taking out and redoing a feather because I didn’t like how it turned out. I again ripped out the last two feathers at the end for the same reason. On this second wreath I made it all the way to the end without any problems, but wasn’t totally satisfied with my last feathers.


I ended up with this little triangle where the little green frond is in the center of the photo. I decided not to undo it because I couldn’t see a way to fix it.


When you stand back and look at the whole wreath you don’t notice it. Especially since the green frond distracts from it (top, center of photo).  My feathers are very humble looking and I’ve decided that is okay with me.

I really worked on relaxing while quilting this time. It is a smaller quilt – about 47 inches square - so that helps. I went slower than I usually do - trying to take my time with it. I think some of us who took free motion quilting classes in the 90’s were told to go fast and I’m having to unlearn that.

So, what is my new distraction? Chalk paint! Have you heard of it? No, not chalkboard paint, although I understand it can be used for that, but chalk paint – specifically the Annie Sloan brand (haven't heard of any other). There was an article in the Home section of The Washington Post this morning about a local blogger Christen Bensten and her use of chalk paint to bring new life to old furniture. Her blog is Blue Egg Brown Nest. I’ve recently been thinking about painting my grandmothers dining room set. It's about 90 years old, very dark and very beat up and I’d like to brighten it up. I wasn’t looking forward to stripping it and all that mess and I think the chalk paint might be an easier solution for me. It can go straight onto most surfaces. I spent way too much time online this morning investigating it. I found another blog Miss Mustardseed, an online source in the U.S. Best Furniture Paint and a nearby shop that carries the paint. I just may stop by there tomorrow. I have some smaller pieces of furniture I can use for testing.

Have a great weekend and I hope you find time to stitch!

Thursday, February 2, 2012

Where Did January Go?


January was way to busy! I have been stitching whenever I can so I have some progress to share.


A year later and I finally finished Lori’s 2011 Humble Quilts quiltalong. I’m very happy with it. I hope it doesn’t take me a year to finish Pink Lemonade, her 2012 quiltalong.


I’ve also been doing a good bit of hand quilting and stitching on other projects. I’m doing a little every evening and, though I’m slow, I’m seeing a lot of progress after just a couple weeks.

On the Design Wall-


I’ve got a top! I’m so happy I finally finished this top. As I worked on it I was thinking about how to quilt it and I think I’ve settled on feathers in the big open spaces and I’m not sure what to call the quilting I’m going to do on the stars and diamonds (concave diamonds?) so you’ll just have to wait and see! ; c ) I need to practice the feathers and I hope I can come up with something that looks okay. Knowing ahead of time that I want this to hang in the Quilters Unlimited show makes me a little nervous. I’m usually more of a – “well if it gets done it goes in, if not, oh, well”. But this is part of a challenge and I don’t want to embarrass myself!

My two schoolhouses – don’t know when I will get more made, but I’m pretty sure I will stay with the dark blues.

I found some of my dark blue stash hiding with my spool blocks. I made 3 more at a swim meet last week. Hand piecing may be slow but it is more forgiving.

More baskets – one more (in addition to the first one) for my project using 19th century reproductions and a new one for an exchange. I’m on the Quilters Unlimited 2012 Quilt Show committee and at our December meeting we were invited to join an exchange/challenge. We were given half a yard of a new red Jinny Beyer palette fabric. We each picked a 6” block design of our choice and we have to use this red fabric and a white or white on white in the block. We are also allowed to add additional fabrics, but it looks like most participants are keeping it to just the two. I decided to do the basket because that was what I was making when the challenge came up and I couldn’t decide on anything else. I need to make 18 of these blocks for our May meeting. We will go home with 18 different blocks and are challenged to make a quilt to go in the 2013 show. Sounds like fun!


And here are 126 blocks from the McLean QU 9-patch exchange I organized. Some of us enjoyed it so much we are doing it again in February. I will get 66 more blocks. With the addition of some setting blocks/sashing/borders – whatever I settle on – it will make a large lap size quilt or maybe a twin if I add more 9-patches. The blocks will finish at 3 inches.

I guess that's it for now. I plan to practice machine quilting feathers this weekend and maybe make some baskets or 9-patches. I hope you find time to stitch this weekend. ; c )

Saturday, January 21, 2012

Schoolhouse Block Tutorial


My last post was a brief one, this one much longer. It’s fun seeing all the 3” house blocks so many of you are sharing on your blogs. I thought about joining in, but just wasn’t into piecing that tiny block with many pieces. At the same time I kept coming across schoolhouse blocks in books and magazines and a blog or two - Needle Turnings and Repro Quilt Lover. When I came across a diagram on the Passion Patchwork blog mapping out the piecing order I was ready to give it a try. A couple people seemed interested in how I pieced my schoolhouse block so I thought I’d share it. I couldn’t find a ruler among the many I own with the right angle for the roof so I paper pieced the roof section. Here we go-

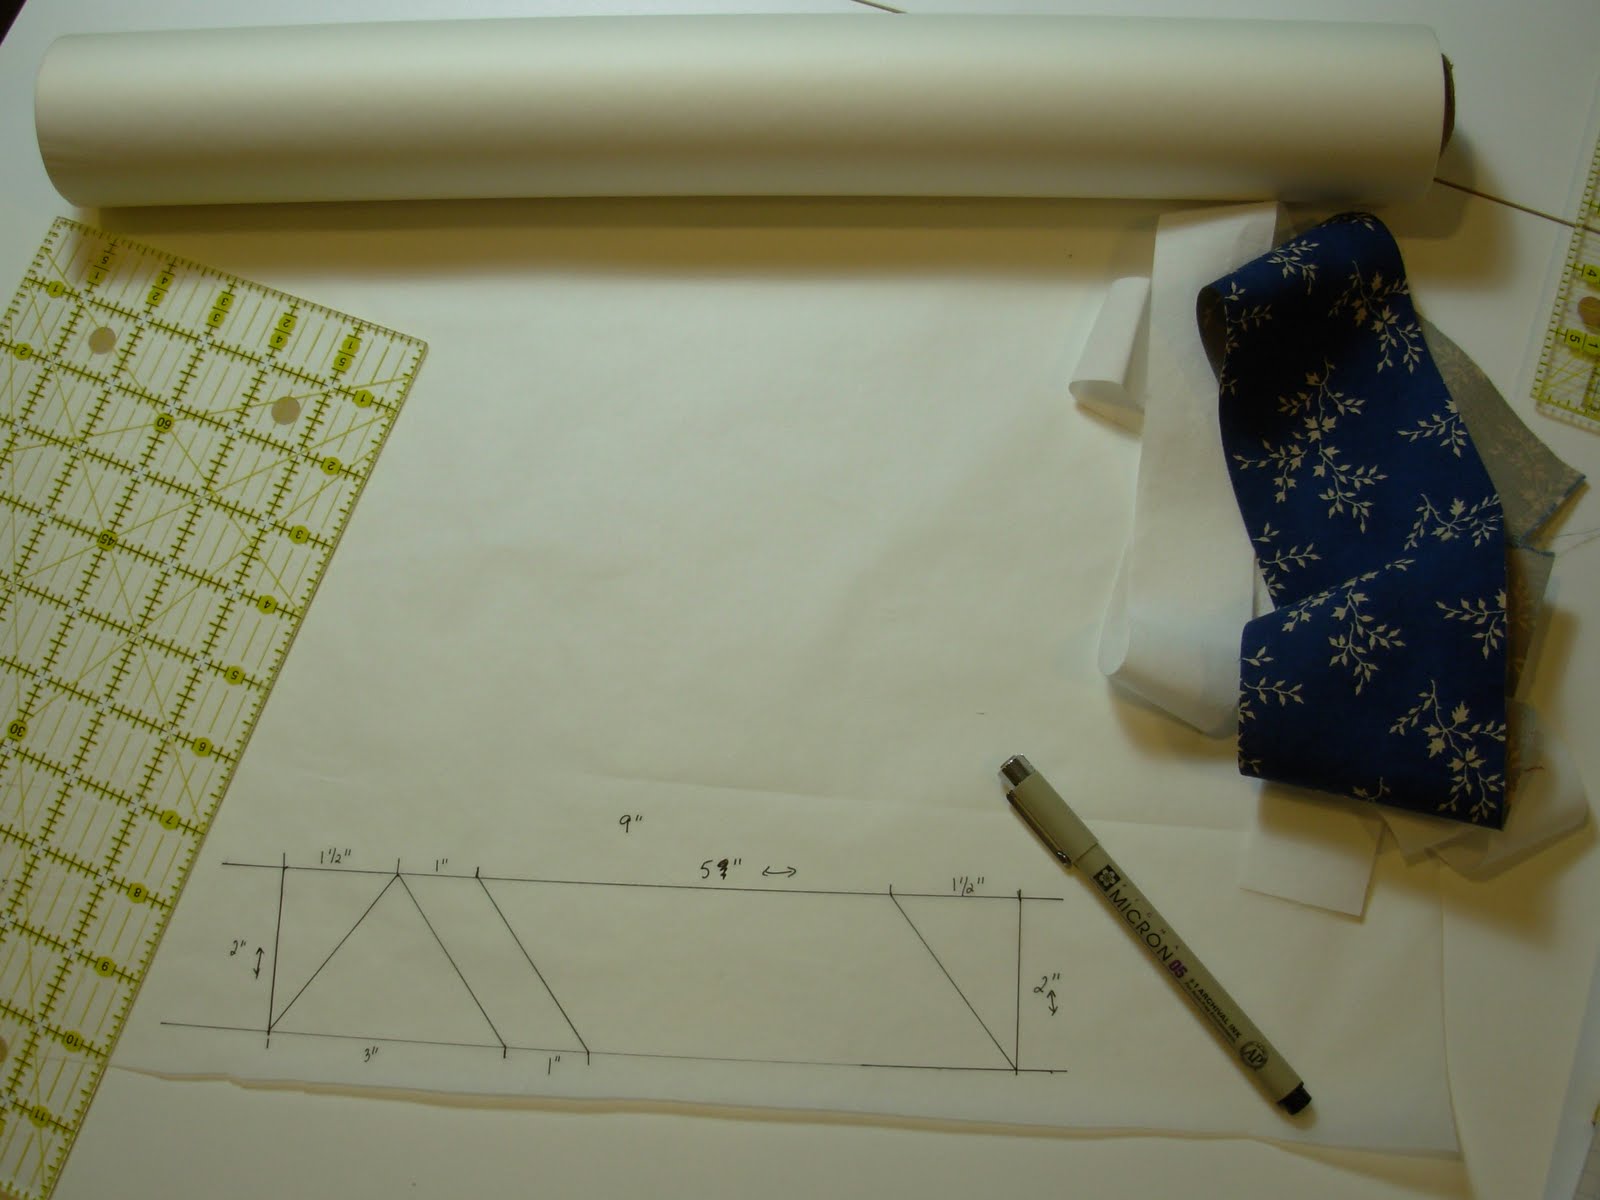
This is the diagram I drew for a 9" finished block-


Cutting instructions for sections A and C-

From white fabric-      2-   2 ½” x 2”
1-    2 ½” x 4 ½”
1-    1 ½” x 3 ½”
2-    1 ½” x 5 ½”
3-    1 ½” x 2 ½”

From blue fabric-        5-   1 ½” x 2 ½”
4-    1 ½” x 3 ½”
2-    1 ½” x 5 ½”

For section B (the roof) you will use the remainder 1 ½” strip of white. You will also need a 2 ½” strip from the white fabric and a 3” strip from the blue.


Piece sections A and C using the numbers in the diagram for piecing order-


My source for paper piecing instructions is Show Me How to Paper Piece by Carol Doak. Use a large needle in your machine (90/14) and a smaller stitch length (18-20 stitches per inch or 1.5 on a machine with a range of 0-5).

I drew section B on tracing paper-

Added 1/4" all around-
Sorry for this poor photo and confusing drawing. If you like, email me and I will send you a pdf of this section.

Click on the the photos to enlarge.

With paper right side up, cover piece 4 (I should have labeled these- piece 4 is the big section of roof) with a piece of your 3" blue strip (cut it making sure it extends at least 1/4" all around). Place a piece of the 2 1/2" white strip on the blue strip so it will cover piece 5. Since section B is asymmetrical it is important that the fabric is right side up on the marked side of the paper.


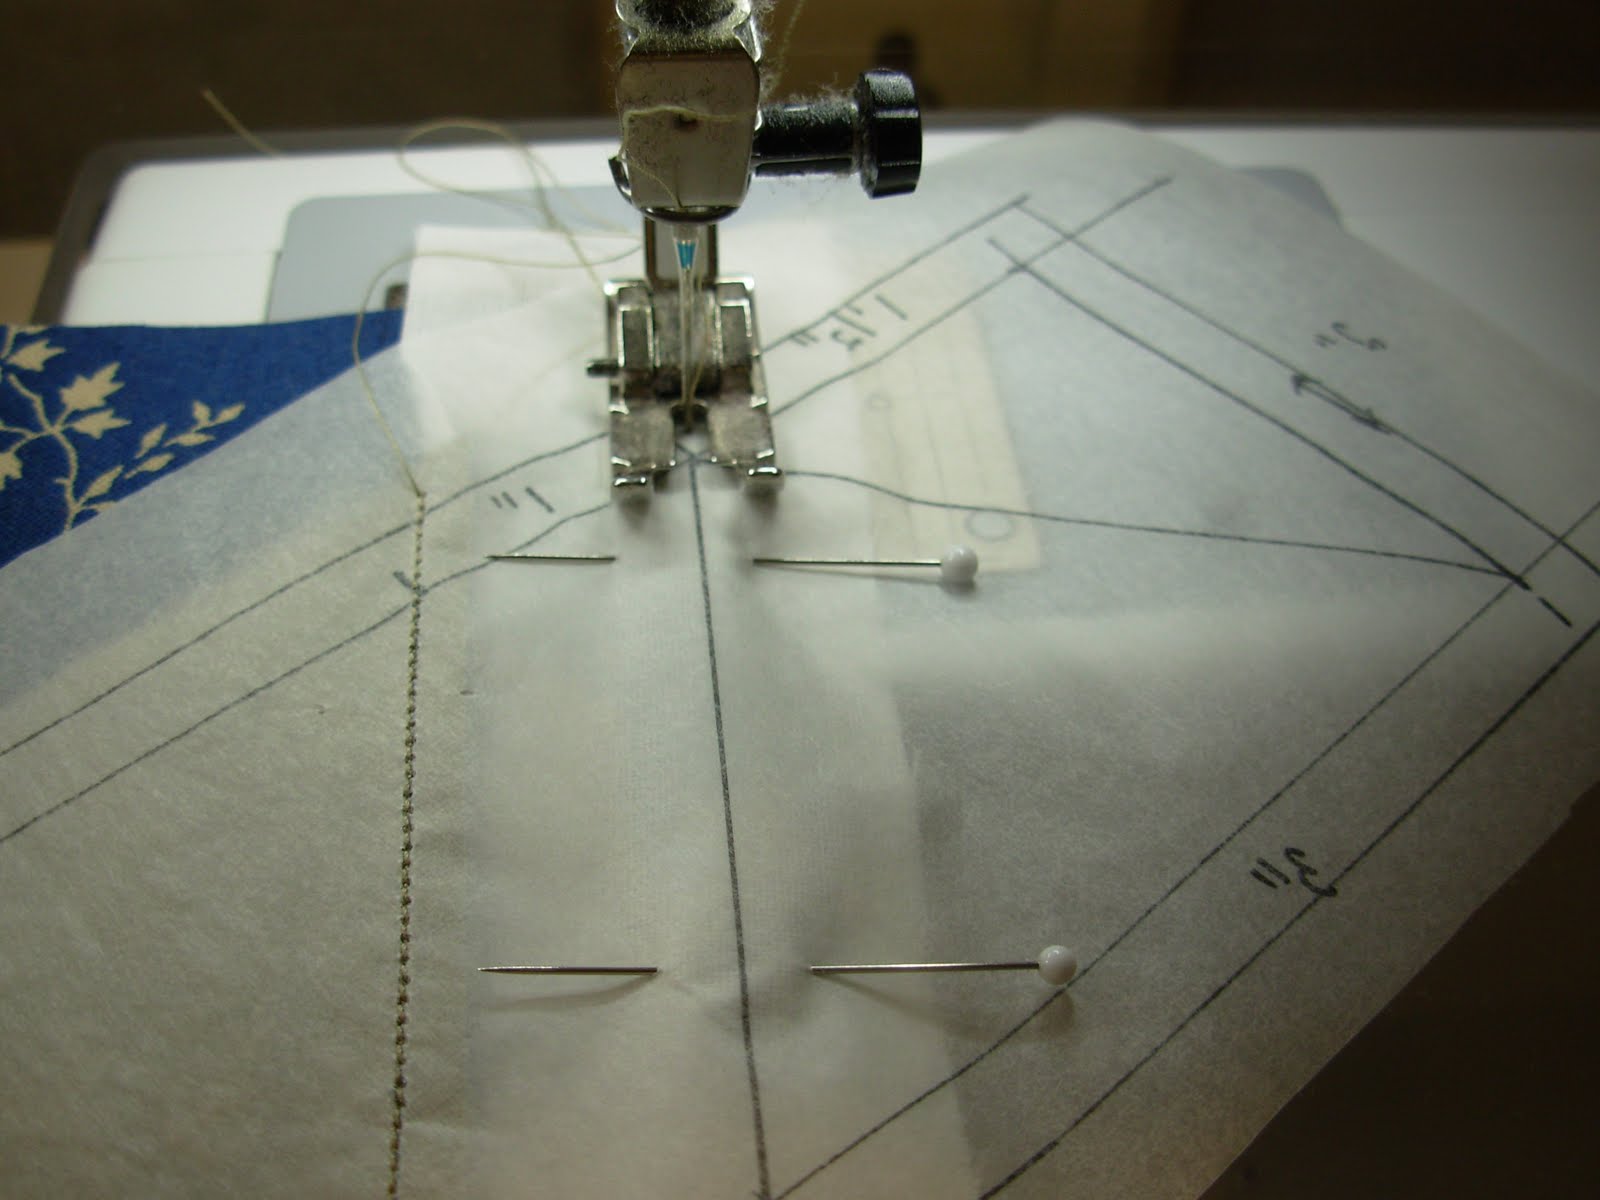
 Turn over and pin-

 Stitch-

I like using my "add an eight" ruler to trim the seam allowances.


 Press without steam-

Right side of the roof complete. Now start on the other side using the 1 1/2" white strip-


For the triangle use the 3" blue strip. Make sure you have it placed so it will cover the whole triangle when flipped over.


For the last piece (which is actually piece 1 in the diagram) use the 2 1/2" strip-


This is what it looks like after all the pieces are sewn and pressed-

The other side-

Trim all the way around being sure to keep your 1/4" seam allowance-


This is what I do to make sure seams match up where they need to. Measure 1/4" between piece 2 and 3.

I would do the same between pieces 8 and 9, but since I have the paper I can use the 1/4" line.

Keep that pin going straight through both sections and pin on either side. Remove the pin in the middle. Pin the rest of the seam, doing the same where seams need to intersect just right. Stitch.

I pressed the seams toward section B to minimize any blue shadowing through the white.

Not too bad-

  
Remove the paper-

Finished block-

To the one person who made it this far! Hi, Mom! LOL. Please let me know if you have any questions. I didn't show every single step, though it may seem like it. I'm sure there are plenty of videos on Youtube showing you how to paper piece. I always do a quick review in Carol Doak's book and think about what I'm doing before I stitch. Because of the small stitch length you want to avoid having to rip out.

I'm not exactly sure where I'm going with these blocks. Can't believe I've started another quilt! I will probably keep it relatively small - maybe 20 blocks and with 3" white sashing all around.