
My last post was a brief one, this one much longer. It’s fun
seeing all the 3” house blocks so many of you are sharing on your blogs. I thought
about joining in, but just wasn’t into piecing that tiny block with many pieces.
At the same time I kept coming across schoolhouse blocks in books and magazines
and a blog or two - Needle Turnings and Repro Quilt Lover. When I came across a diagram on the Passion Patchwork blog mapping out the piecing order I was ready to give it a try. A couple
people seemed interested in how I pieced my schoolhouse block so I thought I’d
share it. I couldn’t find a ruler among the many I own with the right angle for
the roof so I paper pieced the roof section. Here we go-

Cutting instructions for sections A and C-
From white fabric- 2- 2 ½” x 2”
1-
2 ½” x 4 ½”
1-
1 ½” x 3 ½”
2-
1 ½” x 5 ½”
3-
1 ½” x 2 ½”
From blue fabric- 5- 1 ½” x 2 ½”
4-
1 ½” x 3 ½”
2-
1 ½” x 5 ½”
For section B (the roof) you will use the remainder 1 ½”
strip of white. You will also need a 2 ½” strip from the white fabric and a 3”
strip from the blue.
Piece sections A and C using the numbers in the diagram for
piecing order-


My source for paper piecing instructions is Show Me How
to Paper Piece by Carol Doak. Use a large needle in your machine (90/14)
and a smaller stitch length (18-20 stitches per inch or 1.5 on a machine with a
range of 0-5).
I drew section B on tracing paper-
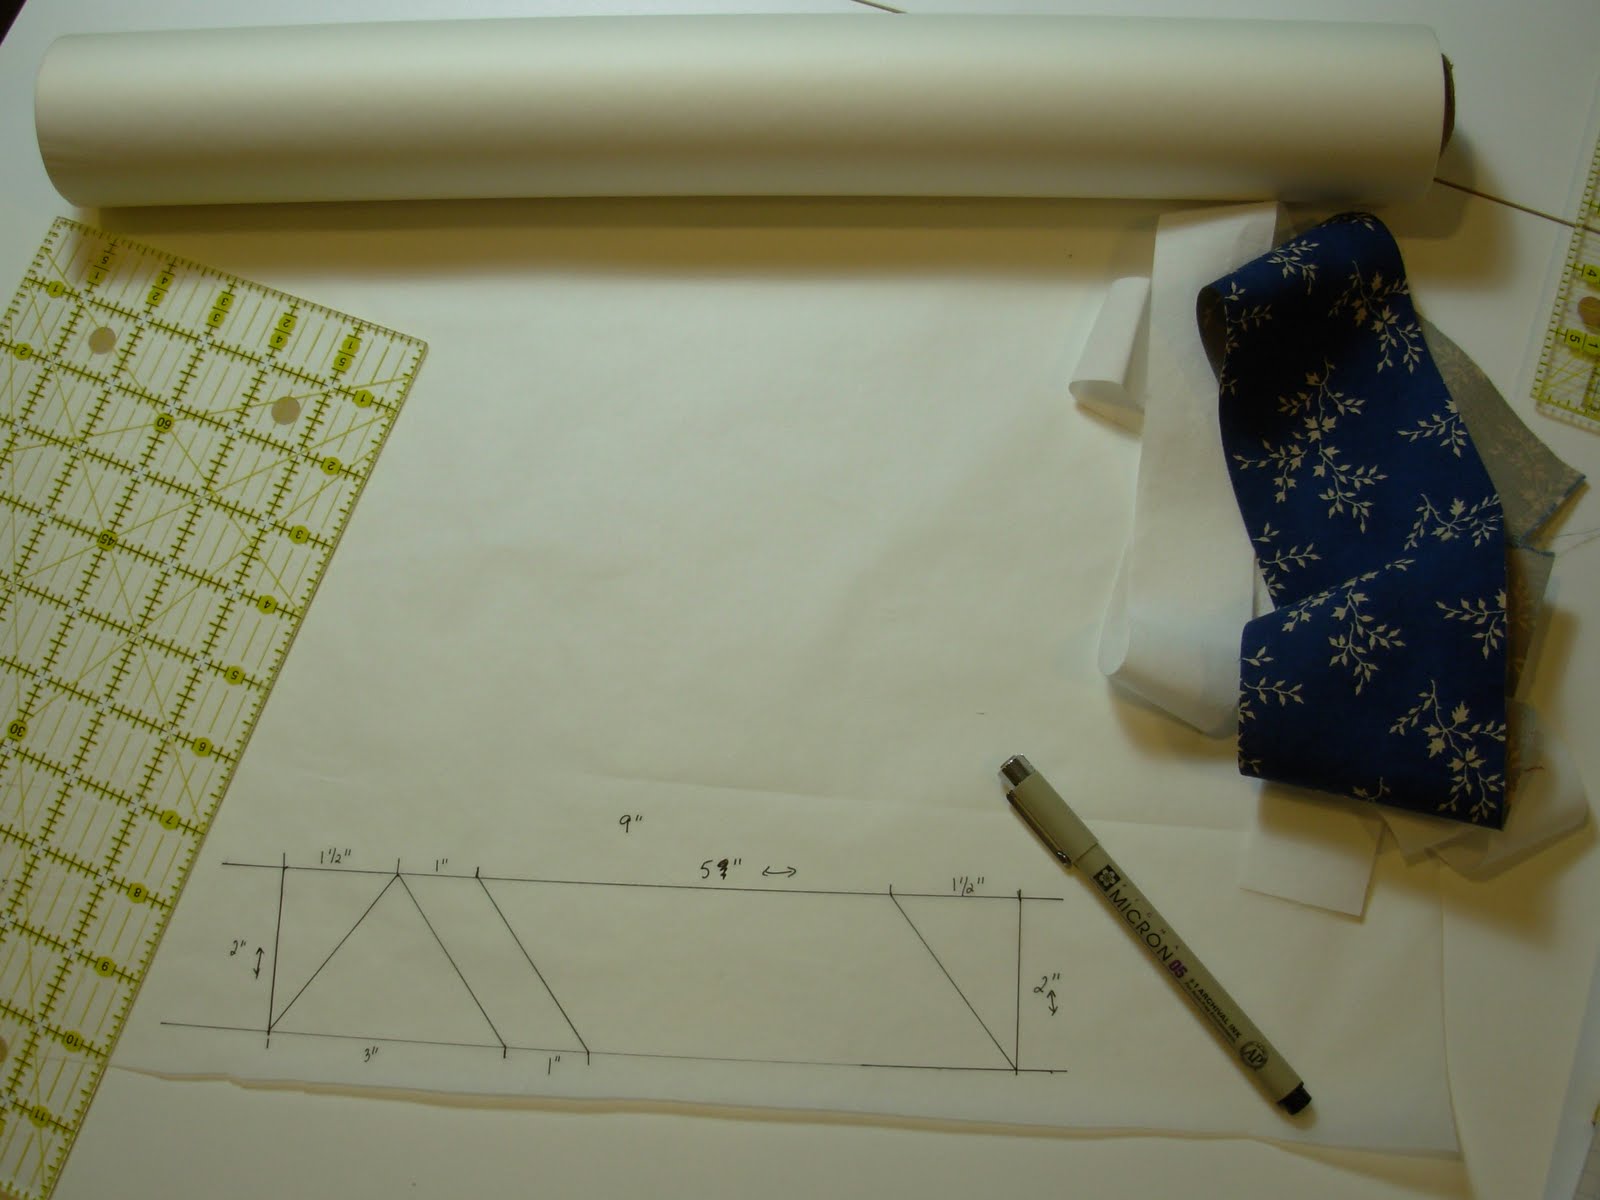
Added 1/4" all around-

Click on the the photos to enlarge.
With paper right side up, cover piece 4 (I should have labeled these- piece 4 is the big section of roof) with a piece of your 3" blue strip (cut it making sure it extends at least 1/4" all around). Place a piece of the 2 1/2" white strip on the blue strip so it will cover piece 5. Since section B is asymmetrical it is important that the fabric is right side up on the marked side of the paper.

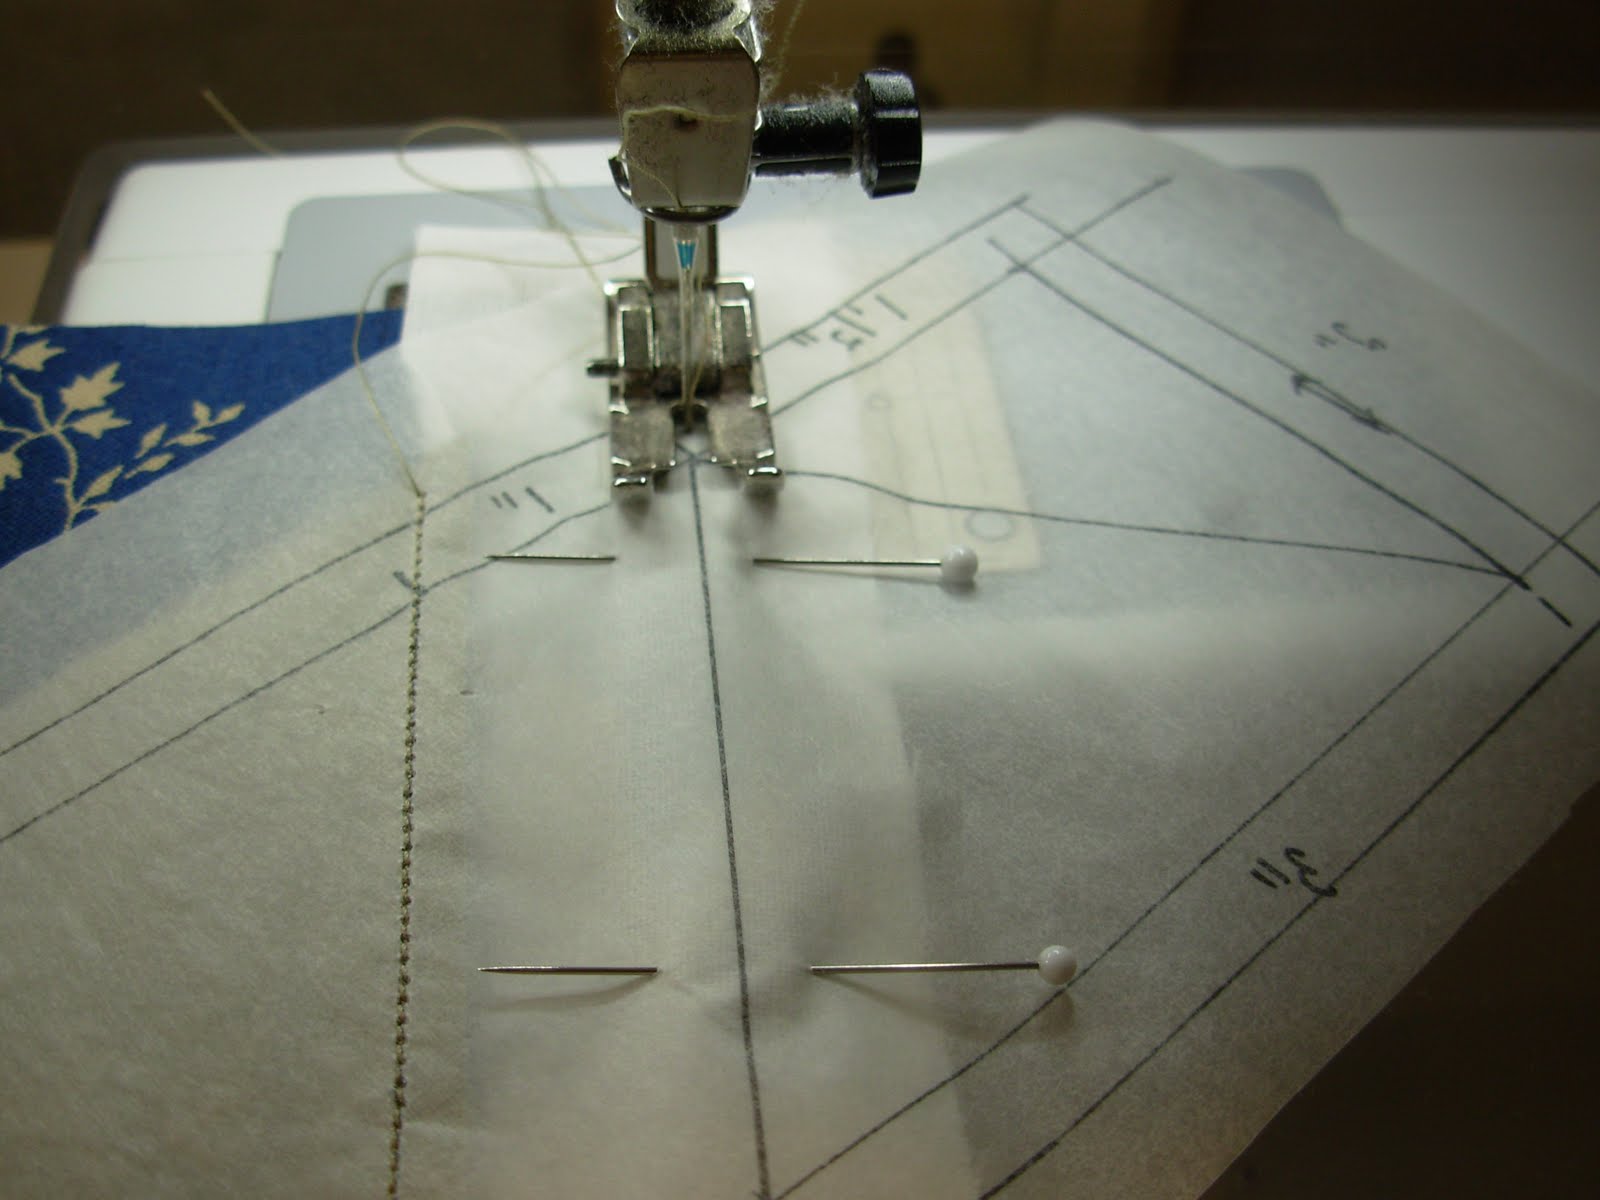
Turn over and pin-

Stitch-

I like using my "add an eight" ruler to trim the seam allowances.


Press without steam-

Right side of the roof complete. Now start on the other side using the 1 1/2" white strip-


For the triangle use the 3" blue strip. Make sure you have it placed so it will cover the whole triangle when flipped over.


For the last piece (which is actually piece 1 in the diagram) use the 2 1/2" strip-


This is what it looks like after all the pieces are sewn and pressed-

The other side-

Trim all the way around being sure to keep your 1/4" seam allowance-


This is what I do to make sure seams match up where they need to. Measure 1/4" between piece 2 and 3.

I would do the same between pieces 8 and 9, but since I have the paper I can use the 1/4" line.

Keep that pin going straight through both sections and pin on either side. Remove the pin in the middle. Pin the rest of the seam, doing the same where seams need to intersect just right. Stitch.

I pressed the seams toward section B to minimize any blue shadowing through the white.

Not too bad-


Remove the paper-

Finished block-

To the one person who made it this far! Hi, Mom! LOL. Please let me know if you have any questions. I didn't show every single step, though it may seem like it. I'm sure there are plenty of videos on Youtube showing you how to paper piece. I always do a quick review in Carol Doak's book and think about what I'm doing before I stitch. Because of the small stitch length you want to avoid having to rip out.
I'm not exactly sure where I'm going with these blocks. Can't believe I've started another quilt! I will probably keep it relatively small - maybe 20 blocks and with 3" white sashing all around.
Thank you for the instructions. I am not ready to start this one but I will watch your progress with interest.
ReplyDeleteAn excellent tutorial. I use perforated paper piecing, since regular paper piecing has not been my friend, but you certainly spelled it out well! Very nice house block!
ReplyDeleteGreat instructions, Maureen! Thanks! And I love how this school house is built.....I'm definitely going to try it with the paper piecing.....I love those perfect intersections!
ReplyDeleteexcellent tutorial....Love the fabric for this house too!
ReplyDeleteits going to be fun watching this grow
Kathie
Great tutorial! This will make a wonderful 2 color quilt!
ReplyDeleteI'm trying to resist the houses too, but they keep popping up. Nine inches seems more manageable than three. Thanks for the instructions.
ReplyDeleteYour house block turned out very well!!! I love foundation paper piecing for those awkward angles etc! Great tutorial!!!
ReplyDeleteA little quilt with these blue/white house blocks is going to look wonderful!!!
Well done in presenting this tutorial. Love the crisp colors in your school house block.
ReplyDeleteGreat tutorial! And I love your block - just beautiful fabric. My fave. *wink*
ReplyDeleteI made a quilt one time with 9 inch schoolhouse blocks. I had to sew, rip out and re-sew every single one of those blocks because I couldn't get that roof/house intersection right. This looks a lot easier!
I am such a visual learner. I love seeing the seperate 1-6, 5-10 sections. It's like a light bulb moment! That is where I struggled when doing my block for the red and white sampler. Thank you!!
ReplyDeleteExcellent tutorial. It must have taken you quite a while to prep each step, sew each step, photograph each step and then organize it all into this post. The finished product is an excellent guide for any of us, from beginners to experienced quilters. Thank you!
ReplyDeleteVery nice tutorial. Easy to follow. I love it. Thanks so much. Hugs
ReplyDeleteyou really invested some time into this very well done tutorial~!!~
ReplyDeleteso well shown and explained~!~
i'm trying to resist the fabric housing development trend on the net . . . but am finding it harder and harder . . .
:-)
libbyQ
What a fabulous stepped out tutorial! Thanks! I'll study on it when I return before I start my quilt - thanks for taking such great care to make this post!
ReplyDeleteI really like your block...great tutorial. I have done 3 of the 3" house blocks. They are cute but take awhile to do.
ReplyDeleteGreat info!
ReplyDeleteI'm doing the little 3" ones and mine have become modular homes...cutting the pieces and having 'assembly days'
Looking forward to seeing this quilt come together!
What a great tutorial! Thanks! I really like this one and will be using it for my red and white mystery. It is just the right size as well but I like the proportions on yours mucho better!
ReplyDeleteWhat a darling little blue house! Great tutorial. I will definitely use it when I make some little house blocks someday. Always love your projects and fabrics you choose!
ReplyDeleteLove the block and appreciate the tute! Will you email me the .pdf? Thanks!!
ReplyDeleteI've been working 2 weeks trying to get 1 block of the school house pattern done. I keep telling myself don't give up. In this tutorial is just like the one I'm trying to make. I only wish you had used letters (A B C) to describe each piece. Guess I'll keep looking.
ReplyDeleteHOW I FINALLY JOINED THE ILLUMINATI BROTHERHOOD AFTER MANY FRAUD
ReplyDeleteHELLO everyone, my name is Aileen, I am from Iceland, I am giving my testimony about how I joined the Illuminati brotherhood, I tried to join this organization for many years, I was scammed by some fake agent, I was so depressed that I couldn't feed myself or even pay my bills and family, and I tried to make money in different ways but everything went in vain, I was afraid to contact any Illuminati agent because I had been scammed many times and they ate my hard earned money, one day I came across a post of someone giving his testimony thanking a man named Lord Adams for helping me join the Illuminati brotherhood, then I looked at the man's email and phone number which was written below, I was really scared because I didn't want to lose contact with him again because I had been scammed many times by scammers who ate my 173,000 euros and I left with the money, and then I was so confused that I decided to contact the person whose testimony was given. I called him and communicated with him over the phone. Before he started telling me his story about when he wanted to join, he told me everything I needed to do. Then I decided to call an agent named Lord Adams, who told me everything I needed to do. He did, and I was initiated. To my surprise, I received the benefits of being a new member of the great Illuminati brotherhood. I was so happy that my life had turned around, and it was all thanks to him. For more information, contact the official agent at: adamslord85@gmail.com